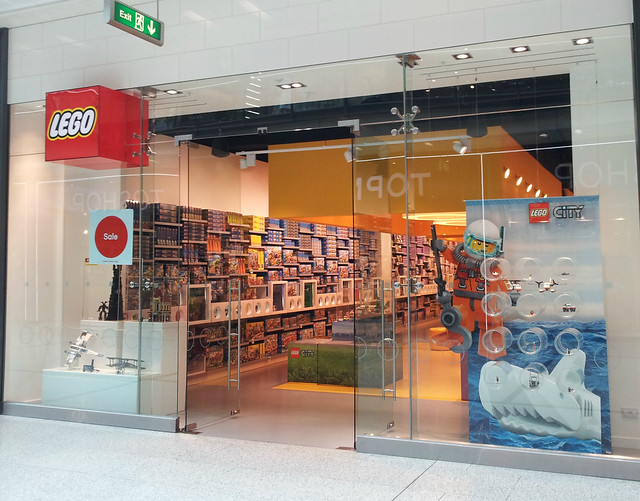
As I mentioned, I had gone to Brighton from St Pancras because I had a cunning plan. Southeastern railways run a domestic service on High Speed 1 (the rails that Eurostar uses) to both Stratford and Ebbsfleet. So off to the first stop of the afternoon Bluewater.

17 December 2013
PaB Crawl - Day 4
Off to the seaside !
Today was going to be a little easier, after repacking the case with little baggies of parts, I now had 9 tubs waiting to be recycled. So with a renewed spring of step, or was it the full english, it was off to Brighton.
Instead of going from Victoria, I went from St Pancras which a) was a lot closer to the hotel and b) would be handy for the second half of the day.
PaB Crawl Day 3 (Part 2)
I've never been one for keeping a diary, so Pepys can rest easy, so where were we....
After a relaxing three hour trip down from Manchester, I arrived in a very warm and sunny Cardiff. Now of course I am lugging my luggage (medium rolling case & laptop style backpack) which are now slowly filling up with ABS plastic.
After a relaxing three hour trip down from Manchester, I arrived in a very warm and sunny Cardiff. Now of course I am lugging my luggage (medium rolling case & laptop style backpack) which are now slowly filling up with ABS plastic.
28 July 2013
PaB Crawl - Day 3
When this day ends, I will have broken the back of the tour. A nice easy one to start today @ Manchester, here's the proof...
25 July 2013
PaB Crawl - Day 2 (Part 2)
Back to Manchester in good order, however, delays are still in effect. Missed the connection at Preston, but there was another about 15 mins behind. This meant that I lost 30 mins at Glasgow.
All was not lost and I completed this one with time to spare, here's the usual pictures.
All was not lost and I completed this one with time to spare, here's the usual pictures.
PaB Crawl - Day2
Day 2 has gotten off to a shakey start, as some lightning took out the signals, in & out of Manchester Piccadilly.
Still I'm on the way to leeds now, running behind 40mins, so it will fun getting to Glasgow later...
Leeds storefront and display
Still I'm on the way to leeds now, running behind 40mins, so it will fun getting to Glasgow later...
Leeds storefront and display

PaB Crawl - Day 1
Off to a good start at Sheffield.
This is a pic of the Front of the store and the display inside

This is a pic of the Front of the store and the display inside
24 July 2013
Updates soon
Having fun with wifi connectivity, tethering and all manner of tablet fun & games...
Next time I'll break out the laptop, I miss my mouse....
I think the mobile versions of Flickr & Blogger could do with a bit of work....
22 July 2013
6 May 2013
Lego Store Tour 2013
Lego Store Tour 2013
For no other reason, than it seemed like a good idea at the time, I have decided to visit each of the UK Lego Stores. (as of the tour that is 12).13 March 2013
LXF files for the Mk III
Here are two links to the LXF files
The baseplate version http://www.mediafire...zxlt9jw2y59t4dn
and the freestanding version http://www.mediafire...jwh7xndcqntw2sj
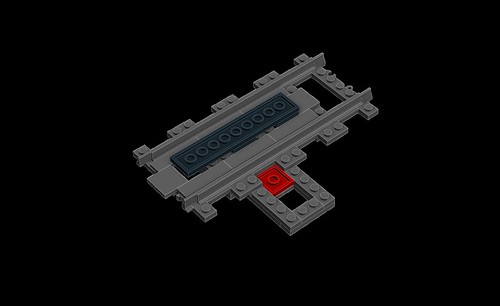
Don't forget that a bit of track either side should be raised up to form a gentle incline, as a sudden 2 plate jump may be a bit steep.
The baseplate version http://www.mediafire...zxlt9jw2y59t4dn
and the freestanding version http://www.mediafire...jwh7xndcqntw2sj
Don't forget that a bit of track either side should be raised up to form a gentle incline, as a sudden 2 plate jump may be a bit steep.
12 March 2013
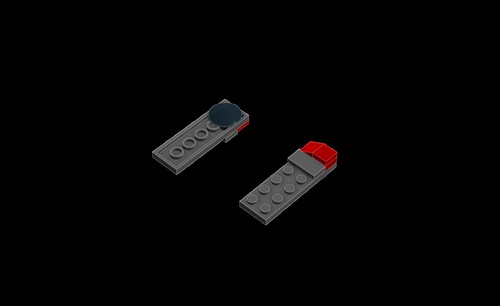
Close but no cigar....
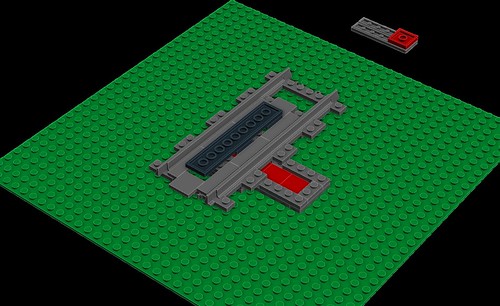
Another day, another version of the decoupler.
The Mk III supercedes the second version, which although worked perfectly, only did so with low clearance wagons.
Lets run through the changes:
The Decoupler
This has now grown to a 2 x 10 plate and has some extra parts in the middle. The wedges are now the important part, with the other bricks being addition weight.
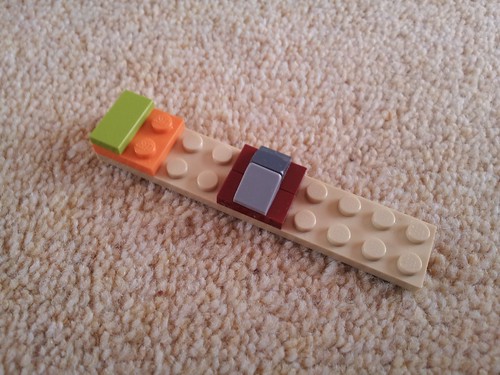
Guide to building the Simple Decoupler version 2
There is nothing to this build, a few common parts
Three sections make up the decoupler.
1) Track section
2) Decoupler
3) Lock
Three sections make up the decoupler.
1) Track section
2) Decoupler
3) Lock
I've done thinking...
I looked at the slider, but there is no flexibility on adding anything else to it, due to small heights available.
So the only other thing to change would be the decoupler itself.
The design now incorporates a 1 x 1 wedge and this allows the slider to move underneath and move the decoupler back into the closed position.
So the only other thing to change would be the decoupler itself.
The design now incorporates a 1 x 1 wedge and this allows the slider to move underneath and move the decoupler back into the closed position.
I see a problem...
Although the slide lock does its job, it doesn't move unless you slightly move the decoupler. Which is a pain, as you only really want to move the slider and nothing else.
More thinking is required.
More thinking is required.
Hang on a minute...
Yes, you may have spotted that although this works, it only works in the sense of decoupling, you can't go back and reattach the disconnected wagon.
So the time machine plans have been put on the back burner, again...
So the time machine plans have been put on the back burner, again...
What about if I added some type of lock that keeps the decoupler in place when not required ?
Lego Train Decoupling
I was perusing the EuroBricks Train Tech Forum and saw a topic on decoupling. The OP was describing an HO scale decoupler, which was track based and worked quite well in separating the wagons/coaches/engines etc.
Now I’d
seen previous solutions and they seemed to be highly engineered, on-board
motorised devices which I wasn’t keen on as it used another motor.
Don’t get
me wrong, I like these solutions and the ones for motorised switches, only if I
had access to lots of motors...
So the
question “Is there a simple decoupler design that can be built from relatively few bricks that works ?” is what I started to think about.
Subscribe to:
Posts (Atom)